Discover top LEGO car building techniques to create realistic models. Unlock tips for detail, structure, and creativity in your next LEGO project!
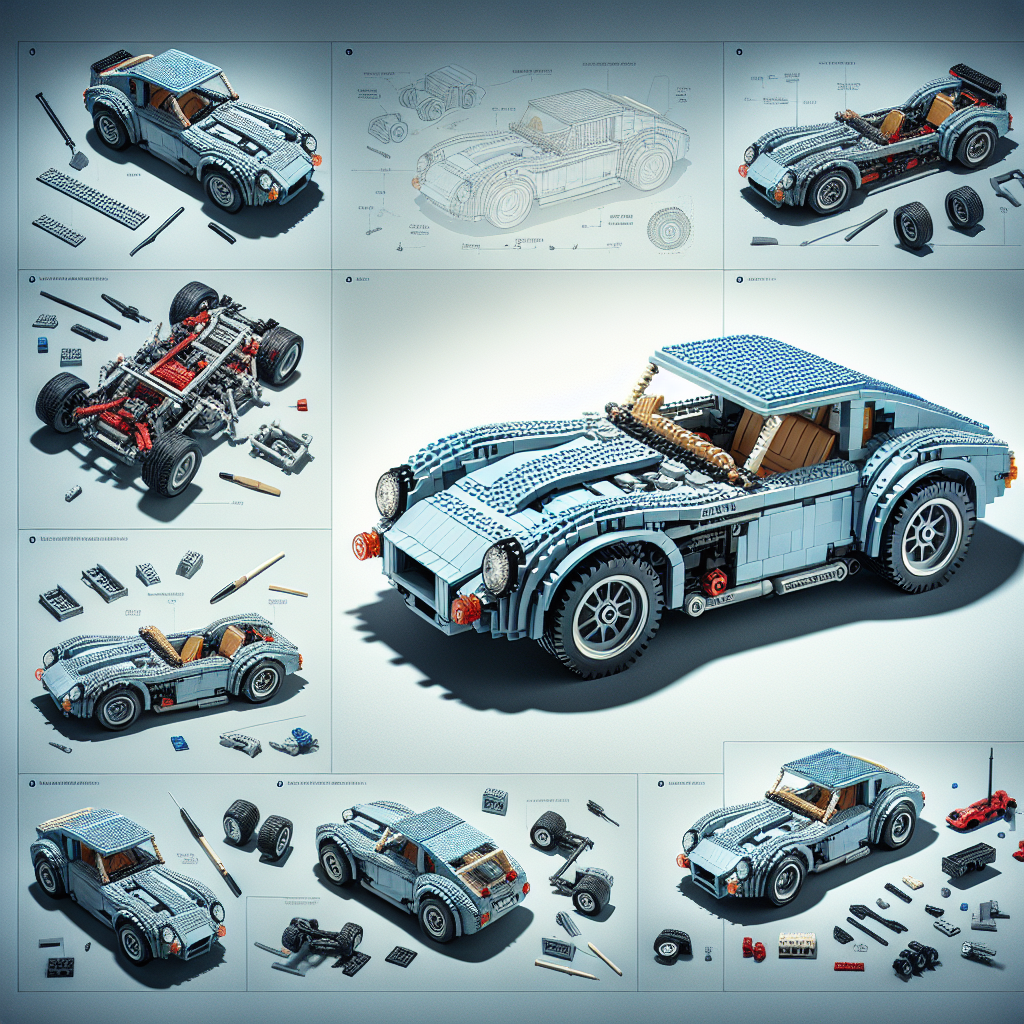
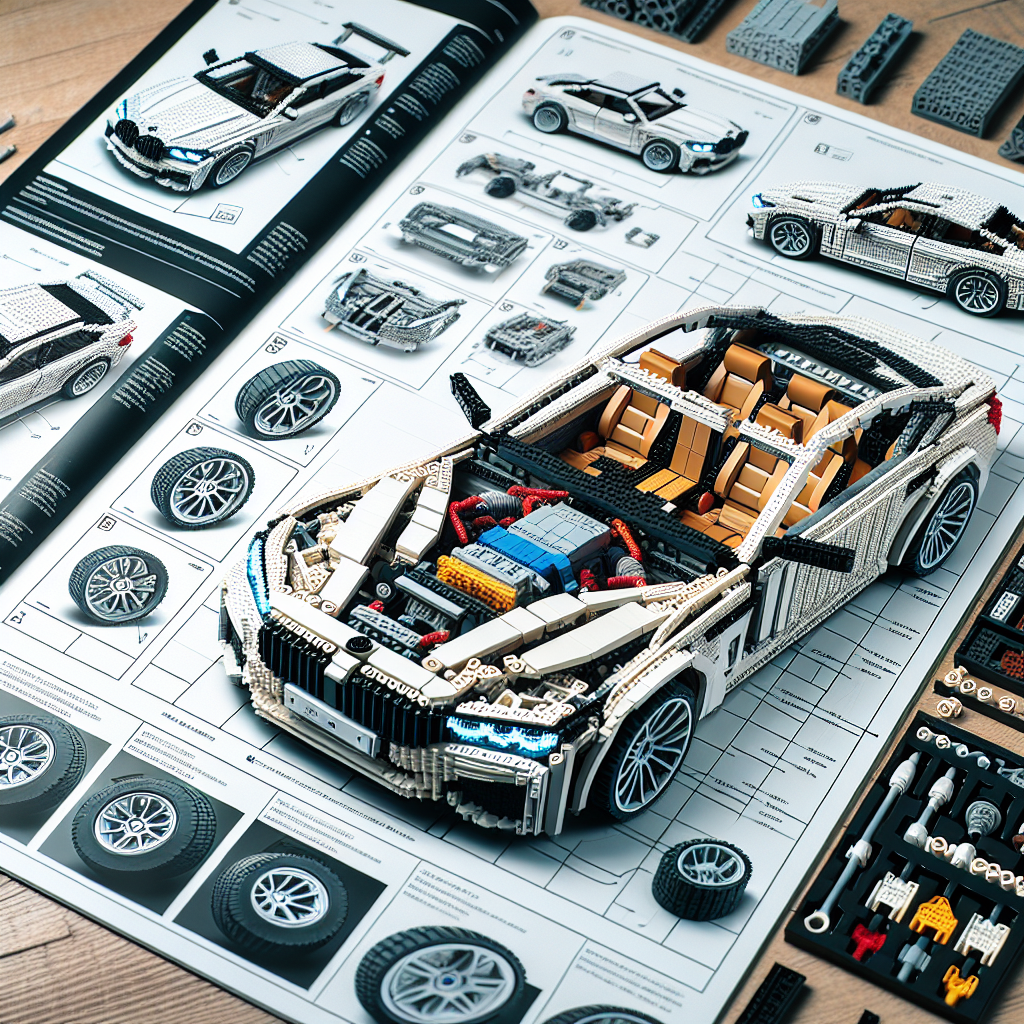
Building realistic LEGO car models can be a rewarding and creative endeavor. Here are some of the best techniques to enhance your LEGO car-building skills and achieve a more realistic look:
### 1. **Use of SNOT (Studs Not On Top) Techniques**
– **SNOT Building**: This technique allows you to position bricks in various orientations, enabling smoother surfaces and more intricate designs. Use bricks with side studs to create details like headlights, grilles, and other features.
### 2. **Incorporate Technic Elements**
– **Structural Integrity**: Use LEGO Technic pieces for the internal structure of your car. This will provide strength and allow for moving parts, such as working doors, hoods, or even steering mechanisms.
– **Suspension Systems**: Implementing a simple suspension system can add realism to your model, especially for off-road or sports cars.
### 3. **Detailing with Small Parts**
– **Use of Small Bricks and Plates**: Incorporate small pieces like 1×1 plates, tiles, and slopes to add details such as vents, lights, and other intricate features.
– **Minifigure Accessories**: Utilize accessories like helmets, tools, or even small animals to add character and realism to your car scene.
### 4. **Color and Texture Variation**
– **Color Schemes**: Choose a color palette that reflects the real-life car you are trying to replicate. Use different shades of the same color for depth.
– **Textured Surfaces**: Mix different types of bricks (smooth tiles, rough bricks) to create texture variations that mimic real car surfaces.
### 5. **Custom Decals and Stickers**
– **Personalized Designs**: Create custom decals or use LEGO stickers to add logos, racing stripes, or other branding elements that enhance realism.
– **Print Your Own**: If you have access to a printer, you can design and print your own stickers to fit your model perfectly.
### 6. **Wheel and Tire Selection**
– **Realistic Wheels**: Choose wheels that match the scale and style of your car. Consider using different tire types for sports cars versus off-road vehicles.
– **Wheel Wells**: Ensure that the wheel wells are appropriately sized and shaped to fit the wheels snugly, enhancing the overall look.
### 7. **Windshields and Windows**
– **Transparent Pieces**: Use clear bricks or specialized windshield pieces to create realistic windows. Consider using tinted pieces for a more modern look.
– **Framing**: Use thin bricks or plates to create window frames, adding to the realism of the car’s design.
### 8. **Aerodynamic Shapes**
– **Sleek Designs**: Focus on creating smooth, aerodynamic shapes. Use curved slopes and angled bricks to mimic the sleek lines of real cars.
– **Fenders and Bumpers**: Pay attention to the design of fenders and bumpers, using appropriate pieces to create a cohesive look.
### 9. **Lighting Effects**
– **LED Lights**: If you’re feeling adventurous, consider integrating small LED lights into your model for headlights and taillights.
– **Reflective Pieces**: Use shiny or reflective pieces to simulate chrome accents found on real cars.
### 10. **Scale and Proportions**
– **Maintain Scale**: Ensure that all parts of your car are in proportion to each other. This includes the size of the wheels, body, and any additional features.
– **Reference Real Cars**: Use images of real cars as references to get proportions and details right.
### 11. **Modular Design**
– **Easily Removable Parts**: Design your car in a modular way so that parts can be easily removed or replaced. This allows for customization and easier repairs.
### 12. **Inspiration from Real Cars**
– **Study Real Models**: Look at real cars for inspiration. Pay attention to their shapes, colors, and details, and try to replicate those in your LEGO model.
By combining these techniques, you can create stunning and realistic LEGO car models that showcase your creativity and building skills. Happy building!
Building realistic LEGO car models can be a rewarding and creative endeavor. Here are three of the best techniques to enhance the realism of your LEGO car builds:
Building realistic LEGO car models can be a rewarding and creative endeavor. To enhance the realism of your LEGO car builds, consider the following techniques:
1. **Attention to Proportions and Scale**: Ensure that the dimensions of your LEGO car model are proportionate and consistent with real vehicles. Pay close attention to the scale of various components, such as the body, wheels, and windows. Utilizing reference images of actual cars can help you achieve accurate proportions, making your model more lifelike.
2. **Incorporation of Details and Accessories**: Adding intricate details can significantly enhance the realism of your LEGO car. Consider incorporating elements such as headlights, taillights, mirrors, and grilles using specialized LEGO pieces or custom modifications. Additionally, accessories like spoilers, decals, and even interior features can contribute to a more authentic appearance.
3. **Utilization of Color and Texture**: The choice of colors and textures plays a crucial role in the overall aesthetic of your LEGO car model. Opt for color schemes that reflect real-world vehicles, and consider using various LEGO elements to create texture, such as using smooth pieces for sleek surfaces and studded pieces for a more rugged look. This attention to color and texture will elevate the visual appeal of your build.
By implementing these techniques, you can create LEGO car models that not only capture the essence of real vehicles but also showcase your creativity and craftsmanship.
### 1. **SNOT (Studs Not On Top) Technique**
The SNOT (Studs Not On Top) technique is a formal approach used primarily in the context of problem-solving and decision-making, particularly in engineering, design, and project management. This technique emphasizes the importance of identifying and addressing the underlying issues or “studs” that may not be immediately visible or apparent in a given situation.
### Key Components of the SNOT Technique:
1. **Identification of Issues**: The first step involves recognizing the core problems or challenges that need to be addressed. This requires a thorough analysis of the situation to uncover hidden factors that may be contributing to the issue.
2. **Prioritization**: Once the issues are identified, they should be prioritized based on their impact and urgency. This helps in focusing efforts on the most critical problems first.
3. **Root Cause Analysis**: The technique encourages a deep dive into the root causes of the identified issues. This may involve techniques such as the “5 Whys” or fishbone diagrams to trace back to the fundamental reasons behind the problems.
4. **Solution Development**: After understanding the root causes, the next step is to brainstorm and develop potential solutions. This should involve collaboration among team members to leverage diverse perspectives and expertise.
5. **Implementation**: Once solutions are identified, they need to be implemented effectively. This may involve creating action plans, assigning responsibilities, and setting timelines for execution.
6. **Evaluation and Feedback**: After implementation, it is crucial to evaluate the effectiveness of the solutions. Gathering feedback and measuring outcomes will help in understanding whether the issues have been resolved or if further adjustments are needed.
### Benefits of the SNOT Technique:
– **Holistic Approach**: By focusing on underlying issues rather than just surface-level symptoms, the SNOT technique promotes a more comprehensive understanding of problems.
– **Enhanced Collaboration**: The technique encourages teamwork and collaboration, leading to more innovative and effective solutions.
– **Improved Decision-Making**: With a clear understanding of root causes and potential solutions, decision-making becomes more informed and strategic.
### Conclusion:
The SNOT technique is a valuable tool for professionals seeking to address complex problems in a structured and effective manner. By focusing on the “studs” that are not immediately visible, teams can develop more robust solutions that lead to sustainable improvements.
The SNOT technique allows builders to position LEGO bricks in various orientations, creating smoother surfaces and more intricate designs. This technique is particularly useful for achieving sleek car bodies and detailed features.
The SNOT (Studs Not On Top) technique is a valuable method employed by builders to manipulate the orientation of LEGO bricks, enabling the creation of smoother surfaces and more intricate designs. This technique is particularly advantageous for achieving sleek car bodies and detailed features, as it allows for a more refined aesthetic and greater design flexibility. By positioning bricks in various orientations, builders can enhance the overall visual appeal and structural integrity of their creations, making SNOT an essential approach in advanced LEGO construction.