Learn how to securely mount LEGO cars in a display frame with our step-by-step guide, ensuring your collection looks great and stays safe!
Mounting LEGO cars in a display frame can be a fun and creative way to showcase your collection. Here are some steps and tips to securely mount LEGO cars in a display frame:
### Materials Needed:
– Display frame (shadow box or deep frame)
– Baseboard or foam board (optional for added support)
– LEGO cars
– Adhesive (e.g., super glue, hot glue, or double-sided tape)
– Mounting putty (optional)
– Small screws or brackets (optional for more secure mounting)
– Ruler or measuring tape
– Pencil or marker
– Craft knife or scissors (if cutting baseboard)
– Level (optional)
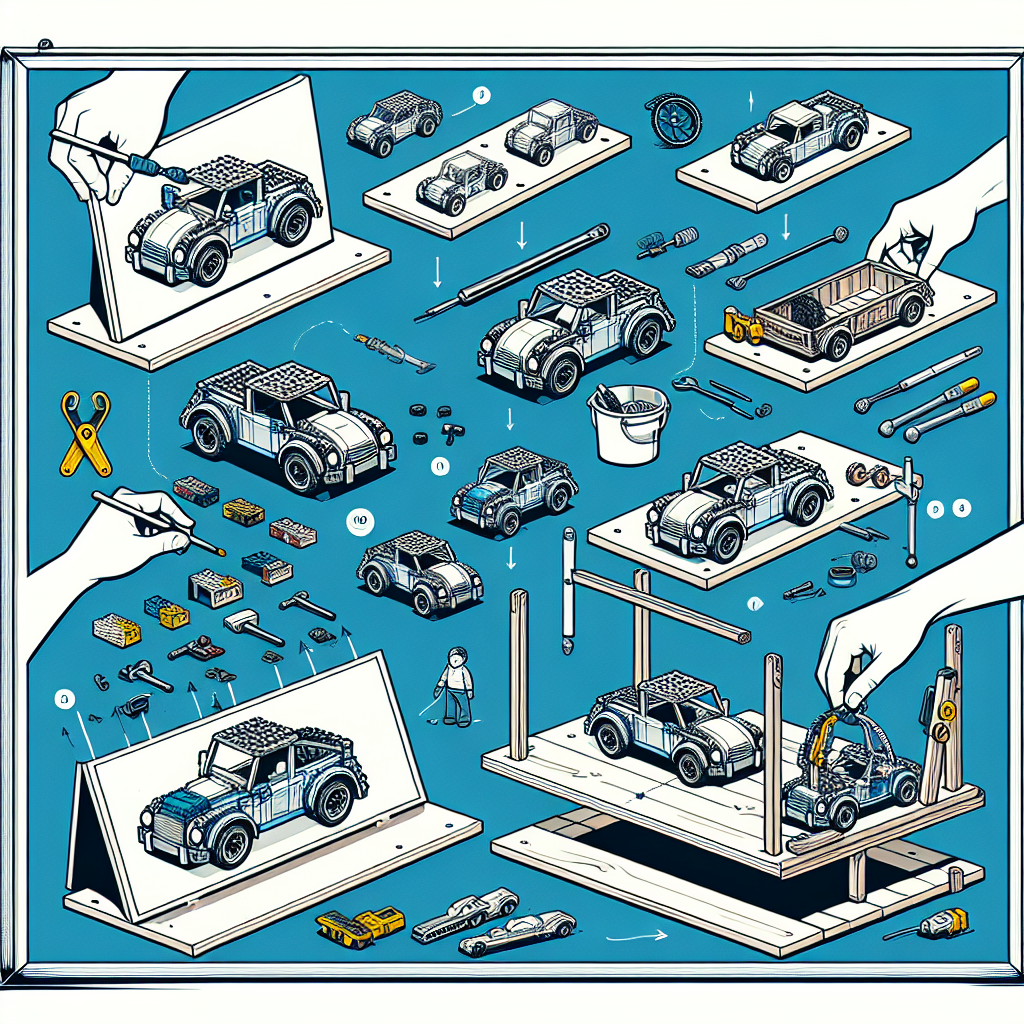
### Steps to Mount LEGO Cars:
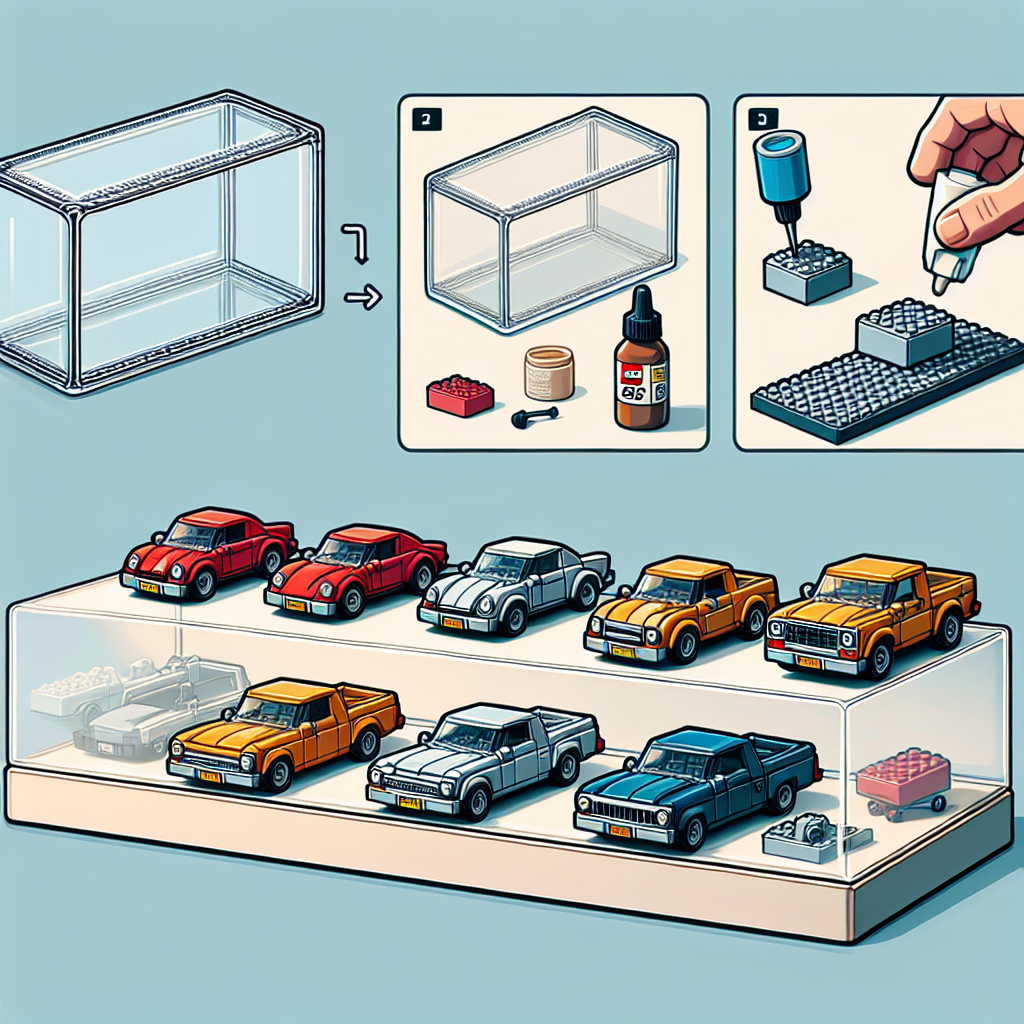
1. **Choose the Right Frame:**
– Select a display frame that is deep enough to accommodate the height of the LEGO cars. A shadow box frame is often a good choice.
2. **Prepare the Base:**
– If desired, cut a piece of baseboard or foam board to fit the bottom of the frame. This will provide a sturdy surface for mounting the cars.
3. **Plan the Layout:**
– Arrange the LEGO cars on the baseboard or directly in the frame without attaching them first. Experiment with different layouts until you find one that you like.
4. **Mark the Positions:**
– Once you are satisfied with the arrangement, use a pencil or marker to lightly mark the positions of each car on the baseboard.
5. **Secure the Cars:**
– **Using Adhesive:** Apply a small amount of adhesive to the bottom of each LEGO car and press it down onto the marked position. Allow the glue to dry completely.
– **Using Mounting Putty:** If you want a non-permanent solution, you can use mounting putty. Roll small pieces and place them under each car before pressing them down.
– **Using Screws or Brackets:** For a more secure option, you can use small screws or brackets. Drill tiny holes in the baseboard and attach the cars using screws, ensuring they are not too long to damage the cars.
6. **Add Background (Optional):**
– If desired, you can add a background to the frame, such as a printed scene or a solid color that complements the cars.
7. **Assemble the Frame:**
– Once all cars are securely mounted and the adhesive has dried, carefully place the baseboard into the frame. Ensure everything is aligned properly.
8. **Seal the Frame:**
– Close the frame securely. If it has a glass front, ensure it is clean and free of fingerprints.
9. **Display:**
– Hang the frame on the wall or place it on a shelf. Use a level to ensure it is straight.
### Tips:
– **Avoid Overcrowding:** Leave enough space between cars to avoid a cluttered look.
– **Consider Lighting:** If possible, display the frame in a well-lit area or add LED strip lights for enhanced visibility.
– **Protect from Dust:** If the frame is open, consider using a glass or acrylic front to protect the cars from dust and damage.
By following these steps, you can create an attractive and secure display for your LEGO cars that showcases your collection beautifully!
Mounting LEGO cars in a display frame can be a fun and creative way to showcase your collection. Here are some steps to securely mount your LEGO cars:
Mounting LEGO cars in a display frame can be an enjoyable and creative endeavor that allows you to showcase your collection effectively. Below are the steps to securely mount your LEGO cars:
### Materials Needed:
– Display frame (shadow box or similar)
– Baseboard or mounting board (optional)
– Adhesive (e.g., super glue, epoxy, or double-sided tape)
– Mounting putty (optional)
– Ruler or measuring tape
– Pencil or marker
– Craft knife or scissors
– Clean cloth
### Steps:
1. **Select the Display Frame:**
Choose a display frame that complements your LEGO cars and fits the available space. A shadow box frame is often ideal, as it provides depth and allows for a three-dimensional display.
2. **Prepare the Base:**
If desired, cut a baseboard or mounting board to fit the interior of the frame. This will provide a stable surface for mounting the cars and can be painted or decorated to enhance the overall presentation.
3. **Clean the Surface:**
Ensure that both the LEGO cars and the mounting surface are clean and free of dust or grease. Use a clean cloth to wipe down the surfaces, as this will help the adhesive bond more effectively.
4. **Plan the Layout:**
Arrange the LEGO cars on the baseboard or within the frame without securing them first. Consider the spacing and orientation of each car to create an aesthetically pleasing display. Use a ruler or measuring tape to ensure even spacing if desired.
5. **Mark the Positions:**
Once you are satisfied with the arrangement, use a pencil or marker to lightly mark the positions of each car on the baseboard. This will serve as a guide for mounting.
6. **Secure the Cars:**
Apply a small amount of adhesive to the bottom of each LEGO car. If using mounting putty, place a small piece on the bottom of the car instead. Carefully position each car on the marked spots and press down firmly to ensure a secure bond. Allow the adhesive to cure according to the manufacturer’s instructions.
7. **Final Assembly:**
If you used a baseboard, carefully place it into the display frame. Ensure that everything is aligned properly before closing the frame. If your frame has a backing, secure it in place.
8. **Display Your Collection:**
Choose a suitable location to hang or place your display frame. Ensure it is in a spot where it can be appreciated without risk of being knocked over or damaged.
9. **Regular Maintenance:**
Periodically check the integrity of the mounts and clean the display to keep your LEGO cars looking their best.
By following these steps, you can create a visually appealing and secure display for your LEGO car collection that showcases your passion for this creative hobby.
### Materials Needed:
It seems like your request is incomplete. Could you please provide more context or specify what materials you need? For example, are you looking for materials for a specific project, event, or topic? This will help me assist you better.
– Display frame (shadow box or deep frame)
To create a formal display frame, often referred to as a shadow box or deep frame, you can follow these guidelines:
### Materials Needed:
1. **Frame**: Choose a high-quality frame that complements the item you want to display. Consider materials like wood, metal, or acrylic.
2. **Backing Board**: A sturdy backing board (foam board or cardboard) to support the item.
3. **Glass or Acrylic Front**: To protect the item from dust and damage.
4. **Mounting Materials**: Depending on the item, you may need pins, clips, or adhesive to secure it in place.
5. **Matting (Optional)**: A mat can add depth and enhance the visual appeal.
### Steps to Create a Formal Display Frame:
1. **Select the Item**: Choose the item you want to display, such as memorabilia, artwork, or collectibles.
2. **Choose the Frame**: Select a frame that matches the style of the item. For a formal look, consider frames with clean lines and a classic finish (e.g., black, gold, or silver).
3. **Prepare the Backing**: Cut the backing board to fit the frame. Ensure it is sturdy enough to support the weight of the item.
4. **Add Matting (Optional)**: If using matting, cut it to size and place it on the backing board. This adds a professional touch and can help draw attention to the item.
5. **Mount the Item**: Secure the item to the backing board using appropriate mounting materials. Ensure it is centered and positioned correctly.
6. **Insert into Frame**: Carefully place the backing board with the mounted item into the frame. If using glass or acrylic, place it on top to protect the item.
7. **Seal the Frame**: Secure the back of the frame to keep everything in place. This may involve using clips, nails, or a backing paper.
8. **Display**: Choose a suitable location to hang or display the frame. Ensure it is well-lit and positioned at eye level for optimal viewing.
### Tips for a Formal Look:
– **Color Coordination**: Match the frame and matting colors to the item for a cohesive look.
– **Consistent Style**: If displaying multiple items, use frames of the same style and color for uniformity.
– **Lighting**: Consider using spotlights or natural light to enhance the display without causing damage.
By following these steps, you can create a formal display frame that showcases your item beautifully and adds elegance to your space.