Discover creative tips to design a personalized display for your LEGO Technic cars, showcasing your builds in style and enhancing your collection!
Creating a personalized display for your LEGO Technic cars can enhance their visual appeal and showcase your creativity. Here’s a step-by-step guide to help you design and build an attractive display:
### Step 1: Plan Your Display
1. **Determine the Space**: Decide where you want to display your LEGO Technic cars. Measure the available space to ensure your display fits well.
2. **Select the Number of Cars**: Consider how many cars you want to display. This will influence the size and design of your display.
3. **Theme and Style**: Think about a theme or style for your display. It could be a racing theme, a garage setting, or a cityscape.
### Step 2: Choose Your Materials
1. **Base Material**: Use a sturdy base like wood, acrylic, or a large LEGO baseplate. Ensure it can support the weight of your cars.
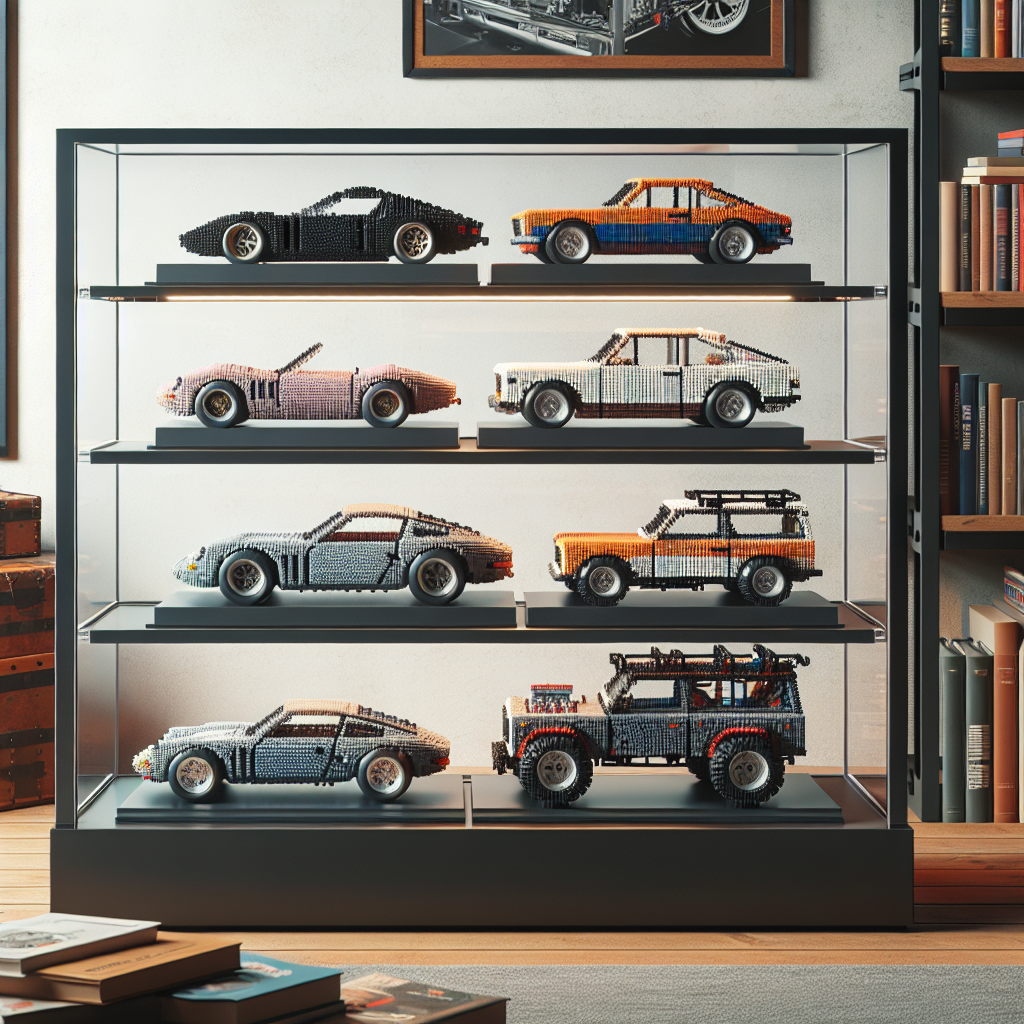
2. **Display Case**: Consider using a glass or acrylic display case to protect your models from dust and damage.
3. **Background**: You can use printed images, painted wood, or LEGO bricks to create a backdrop that complements your cars.
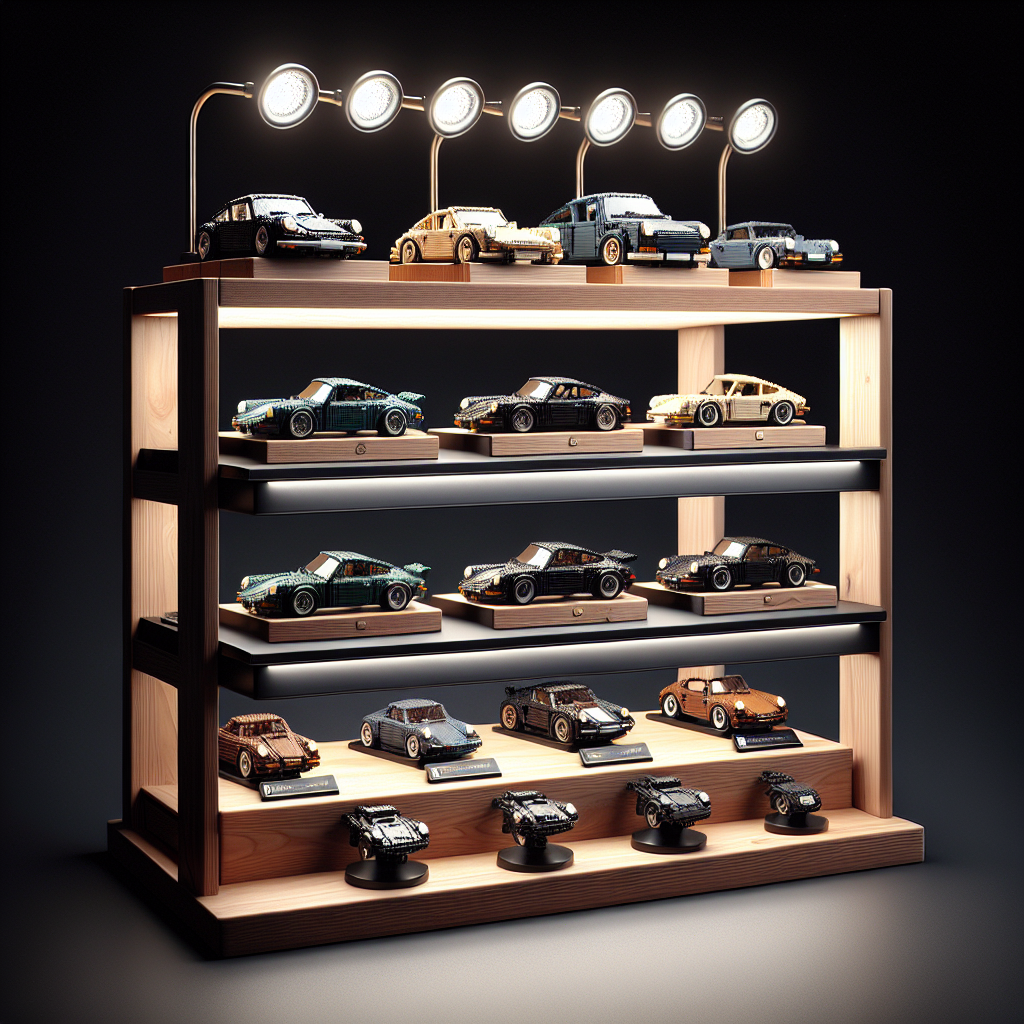
4. **Lighting**: LED strip lights or small spotlights can enhance the display and highlight your models.
### Step 3: Design the Layout
1. **Arrange the Cars**: Experiment with different arrangements for your cars. You can place them in a line, in a circular pattern, or at different angles for visual interest.
2. **Add Accessories**: Incorporate LEGO accessories like trees, buildings, or roads to create a scene. You can also use non-LEGO items like miniature tools or trophies.
3. **Levels and Heights**: Use risers or platforms to create different levels in your display. This adds depth and makes it more visually appealing.
### Step 4: Build the Display
1. **Construct the Base**: If using wood or acrylic, cut it to size and sand the edges for a smooth finish. If using LEGO baseplates, connect them securely.
2. **Create the Background**: Attach your chosen background material to the back of the display. Ensure it’s securely fastened.
3. **Add Lighting**: Install any lighting you’ve chosen. Make sure it’s positioned to highlight the cars without causing glare.
4. **Secure the Cars**: Use adhesive putty or small stands to secure your LEGO Technic cars in place, preventing them from tipping over.
### Step 5: Personalize Your Display
1. **Labels and Signs**: Create labels for each car with its name, model number, or a brief description. You can print these or write them by hand.
2. **Color Coordination**: Use colors that complement your cars. You can paint the base or background to match the color scheme of your models.
3. **Add Personal Touches**: Include elements that reflect your personality, such as photos, memorabilia, or custom-built LEGO structures.
### Step 6: Maintenance
1. **Dust Regularly**: Keep your display clean by dusting it regularly. If using a case, you can simply wipe the outside.
2. **Check Stability**: Periodically check that the cars are secure and that the display remains stable.
3. **Update as Needed**: As you build more LEGO Technic cars, consider updating your display to include new models or change the layout.
### Conclusion
Creating a personalized display for your LEGO Technic cars is a fun and rewarding project that allows you to showcase your collection in a unique way. With careful planning and creativity, you can design a display that not only protects your models but also enhances their visual appeal. Enjoy the process and let your imagination guide you!
Creating a personalized display for your LEGO Technic cars can enhance their visual appeal and showcase your creativity. Here’s a step-by-step guide to help you design and build a custom display:
### Step-by-Step Guide to Creating a Personalized Display for LEGO Technic Cars
Creating a custom display for your LEGO Technic cars not only enhances their visual appeal but also allows you to showcase your creativity and craftsmanship. Follow this formal guide to design and build an effective display.
#### Step 1: Define Your Concept
1. **Identify the Purpose**: Determine whether the display is for personal enjoyment, a competition, or a public exhibition.
2. **Choose a Theme**: Consider a theme that complements your LEGO Technic cars, such as a racing environment, a garage setting, or a cityscape.
#### Step 2: Gather Materials
1. **Base Structure**: Select a sturdy base for your display, such as a wooden board, acrylic sheet, or a custom-built frame.
2. **Display Elements**: Gather additional materials such as:
– Stands or risers for elevation
– Backdrops (printed images or painted scenes)
– Lighting options (LED strips or spotlights)
– Decorative elements (miniature trees, road signs, etc.)
#### Step 3: Design the Layout
1. **Sketch Your Design**: Create a rough sketch of your display layout, including the placement of each car and any additional elements.
2. **Consider Accessibility**: Ensure that the display allows for easy access to the cars for maintenance or adjustments.
3. **Balance and Symmetry**: Aim for a balanced arrangement that draws the viewer’s eye without overcrowding the display.
#### Step 4: Construct the Display
1. **Prepare the Base**: Cut and finish your base material to the desired dimensions.
2. **Attach Stands or Risers**: Securely attach any stands or risers to elevate certain cars for better visibility.
3. **Install Backdrop**: If using a backdrop, ensure it is securely mounted and complements the overall theme.
4. **Incorporate Lighting**: Strategically place lighting to highlight the cars and enhance the display’s ambiance.
#### Step 5: Arrange the Cars
1. **Position the Cars**: Carefully place each LEGO Technic car in its designated spot according to your layout design.
2. **Adjust for Aesthetics**: Make minor adjustments to the positioning of the cars to achieve the desired visual effect.
#### Step 6: Add Decorative Elements
1. **Incorporate Accessories**: Add any decorative elements that align with your theme, such as trees, road signs, or other LEGO accessories.
2. **Enhance the Environment**: Consider adding elements that create a sense of environment, such as a racetrack or a garage scene.
#### Step 7: Final Touches
1. **Clean the Display**: Ensure that the display area is clean and free of dust or fingerprints.
2. **Secure the Cars**: If necessary, use adhesive putty or similar materials to secure the cars in place, preventing them from shifting.
3. **Review and Adjust**: Step back and review the entire display, making any final adjustments to enhance its overall appearance.
#### Step 8: Showcase Your Display
1. **Choose a Location**: Select a prominent location for your display, ensuring it is well-lit and easily visible.
2. **Invite Feedback**: Share your display with friends, family, or online communities to gather feedback and suggestions for future improvements.
By following these steps, you can create a personalized display that not only showcases your LEGO Technic cars but also reflects your unique style and creativity. Enjoy the process and take pride in your finished product!
### Step 1: Plan Your Display
### Step 1: Plan Your Display
**Objective:** To create an effective and visually appealing display that communicates the intended message clearly and engages the target audience.
#### 1. Define the Purpose of the Display
– Identify the primary goal: Is it to inform, persuade, entertain, or promote a product or service?
– Determine the key message you want to convey.
#### 2. Understand Your Audience
– Analyze the demographics of your target audience: age, interests, preferences, and behaviors.
– Consider what will resonate with them and how they will interact with the display.
#### 3. Choose the Display Format
– Decide on the type of display: digital, physical, or a combination of both.
– Consider the location and context where the display will be presented (e.g., trade shows, retail environments, online platforms).
#### 4. Develop a Visual Concept
– Create a mood board to gather inspiration and visualize the overall aesthetic.
– Select a color scheme, typography, and imagery that align with your brand and message.
#### 5. Plan the Layout
– Sketch a rough layout of the display, considering the flow of information and visual hierarchy.
– Ensure that the most important elements are prominently placed and easily accessible.
#### 6. Gather Materials and Resources
– List all necessary materials, such as graphics, props, signage, and technology.
– Determine the budget and allocate resources accordingly.
#### 7. Create a Timeline
– Establish a timeline for the design, production, and installation of the display.
– Set deadlines for each phase to ensure timely completion.
#### 8. Evaluate and Revise
– Seek feedback from stakeholders or potential audience members on the initial concept.
– Be open to making adjustments based on constructive criticism to enhance the effectiveness of the display.
By following these steps, you will be well-prepared to create a display that not only captures attention but also effectively communicates your message to your audience.
**Determine the Size**: Measure the dimensions of your LEGO Technic cars to decide how much space you need. Consider how many cars you want to display and their sizes
To determine the appropriate display space for your LEGO Technic cars, it is essential to measure the dimensions of each vehicle accurately. Follow these steps to ensure a comprehensive assessment:
1. **Measure Individual Dimensions**: Utilize a ruler or measuring tape to record the length, width, and height of each LEGO Technic car. It is advisable to measure at the widest, longest, and tallest points to obtain the most accurate dimensions.
2. **Compile Measurements**: Create a list or table that includes the dimensions of each car. This will facilitate a clearer understanding of the space requirements.
3. **Consider Display Arrangement**: Decide how you wish to arrange the cars. Will they be displayed in a single row, stacked, or in a multi-tiered format? The arrangement will significantly influence the total space needed.
4. **Calculate Total Space Requirements**: Based on the individual dimensions and the chosen arrangement, calculate the total space required. For linear arrangements, sum the lengths of the cars and account for any additional space needed for gaps between them. For stacked arrangements, consider the height and width of the display area.
5. **Account for Additional Factors**: Consider any additional factors that may affect space requirements, such as:
– The need for accessibility to view or interact with the cars.
– The inclusion of display cases or shelves that may have specific dimensions.
– Any decorative elements or background displays that may require additional space.
6. **Final Assessment**: After compiling all measurements and considerations, assess the total space needed for your display. Ensure that the chosen location can accommodate the calculated dimensions while allowing for an aesthetically pleasing arrangement.
By following these steps, you will be able to determine the appropriate size and layout for displaying your LEGO Technic cars effectively.