Discover tips and tricks to transform your LEGO F1 car into a stunning photography masterpiece. Capture the speed and detail like never before!
Turning your LEGO F1 car into a photography masterpiece involves a combination of creative staging, lighting, and camera techniques. Here are some steps to help you achieve stunning photos of your LEGO F1 car:
### 1. **Choose the Right Background**
– **Neutral Backgrounds**: Use solid colors or gradients that complement the car’s colors. White, black, or gray can work well.
– **Themed Backgrounds**: Consider using a racetrack, pit stop, or a cityscape backdrop. You can create these using printed images or dioramas.
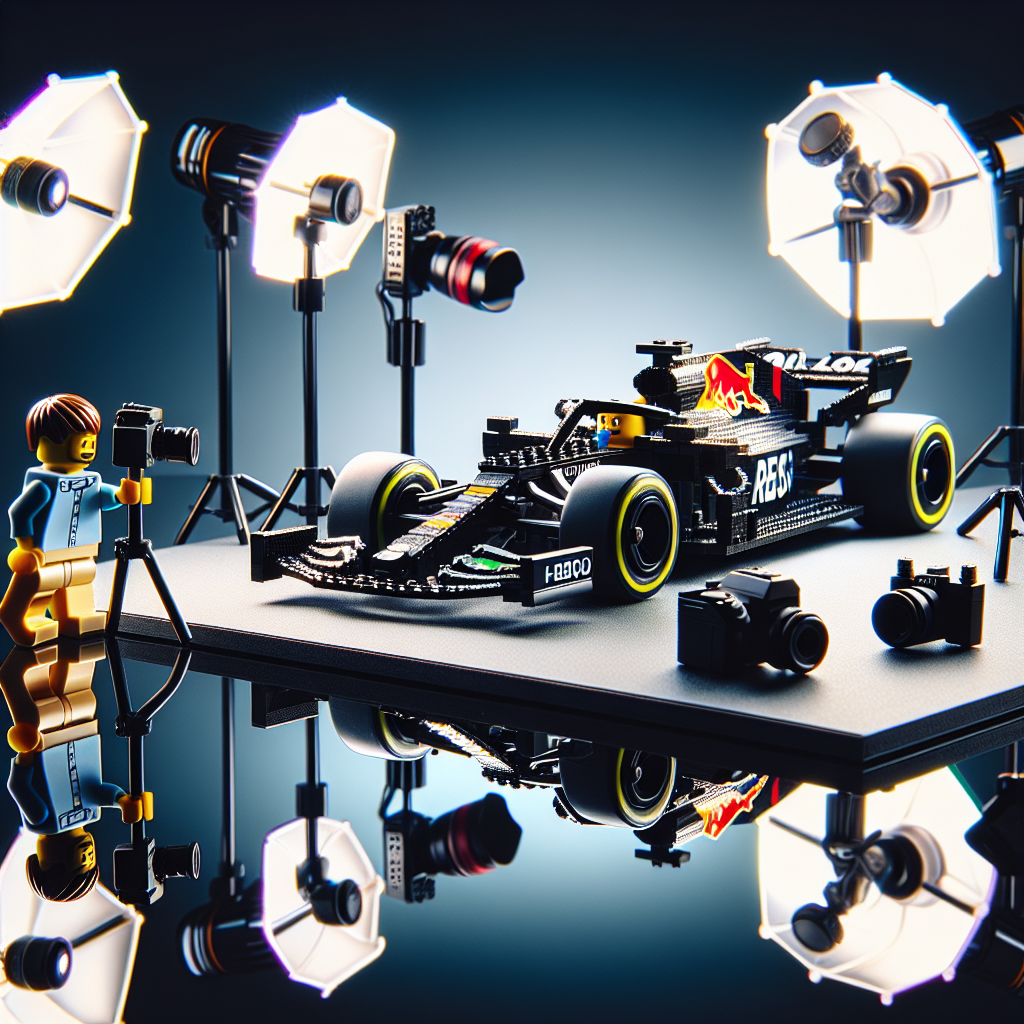
### 2. **Lighting**
– **Natural Light**: Shoot during the golden hour (early morning or late afternoon) for soft, warm light.
– **Artificial Light**: Use softbox lights or LED panels to create even lighting. Avoid harsh shadows.
– **Backlighting**: Experiment with backlighting to create dramatic effects, especially if you have transparent pieces.
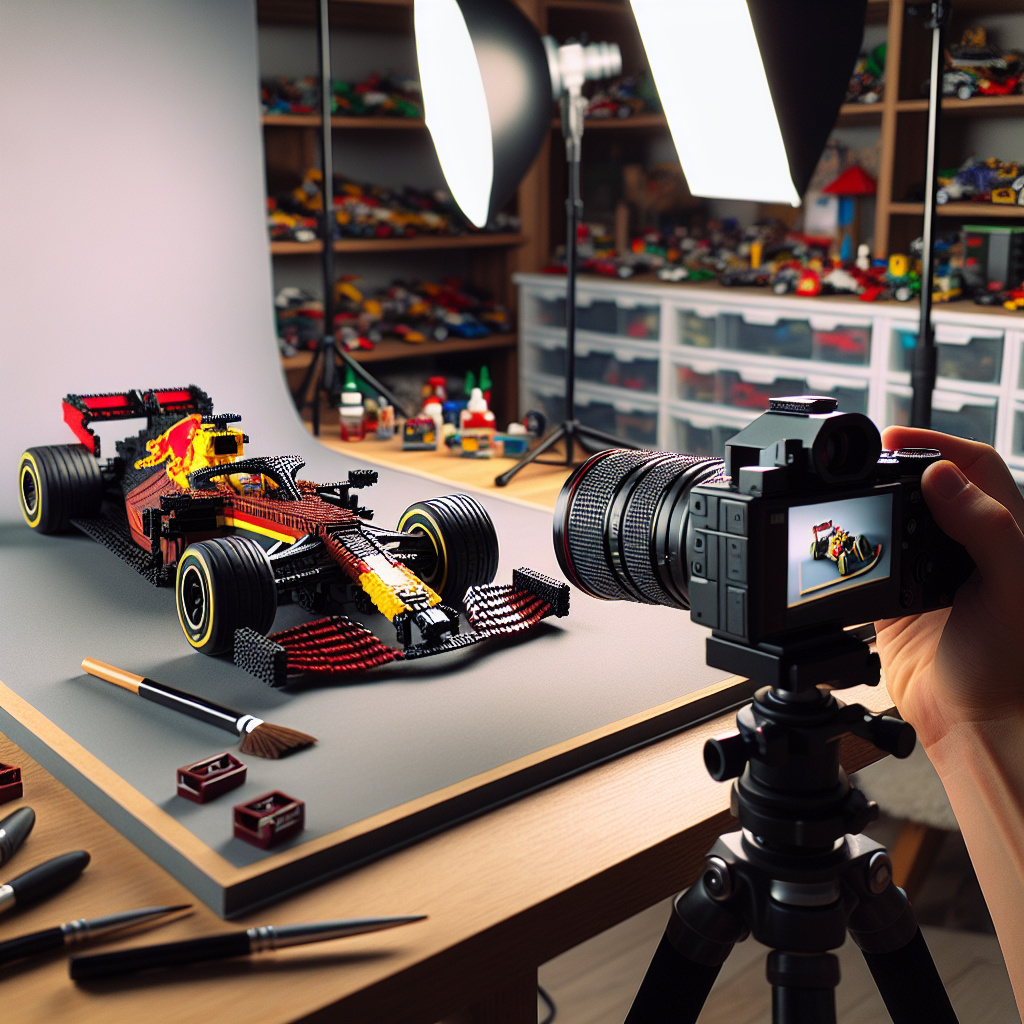
### 3. **Camera Setup**
– **Use a Tripod**: This stabilizes your camera and allows for longer exposure times without blurriness.
– **Manual Settings**: If using a DSLR or mirrorless camera, adjust the aperture for depth of field (f/2.8 to f/5.6 for a blurred background) and ISO for sensitivity to light.
– **Focus**: Use manual focus to ensure the car is sharp and in focus.
### 4. **Angles and Composition**
– **Low Angles**: Get down to the level of the car for a more dynamic perspective.
– **Close-Ups**: Capture details like the wheels, cockpit, and engine to highlight the craftsmanship.
– **Rule of Thirds**: Position the car off-center to create a more engaging composition.
### 5. **Action Shots**
– **Motion Blur**: Use a slower shutter speed to capture motion blur, simulating speed. Move the camera slightly as you take the shot.
– **Props**: Add elements like dust, smoke, or other LEGO vehicles to create a sense of action.
### 6. **Post-Processing**
– **Editing Software**: Use software like Adobe Lightroom or Photoshop to enhance colors, contrast, and sharpness.
– **Filters and Effects**: Experiment with filters to give your photos a unique look, but keep it subtle to maintain realism.
### 7. **Experiment and Have Fun**
– **Try Different Styles**: Play with various photography styles, such as macro photography for close-ups or wide-angle for dramatic perspectives.
– **Incorporate Movement**: If you have a remote-controlled LEGO car, consider capturing it in motion.
### 8. **Share Your Work**
– **Social Media**: Share your photos on platforms like Instagram or LEGO fan forums to get feedback and connect with other enthusiasts.
– **Photography Communities**: Join online groups or local clubs to learn from others and improve your skills.
By combining these techniques, you can create stunning photographs that showcase your LEGO F1 car in a way that highlights its design and your creativity. Happy shooting!
Turning your LEGO F1 car into a photography masterpiece involves a combination of creative staging, lighting, and camera techniques. Here are some steps to help you achieve stunning photos of your LEGO F1 car:
To transform your LEGO F1 car into a photography masterpiece, it is essential to consider various elements such as staging, lighting, and camera techniques. Below are structured steps to guide you in achieving stunning photographs of your model:
### 1. **Preparation of the Subject**
– **Clean the Model**: Ensure that your LEGO F1 car is free from dust and fingerprints. A clean model will enhance the overall quality of the photographs.
– **Check for Details**: Inspect the car for any loose pieces or imperfections that may detract from the visual appeal.
### 2. **Staging the Scene**
– **Choose a Background**: Select a background that complements the car. Options include a racetrack, a simple gradient, or a natural setting. Ensure that the background does not distract from the model.
– **Create Context**: Consider adding elements that enhance the narrative, such as miniature spectators, pit stops, or other LEGO vehicles to create a dynamic scene.
– **Use Props**: Incorporate props like flags, cones, or barriers to add depth and interest to the composition.
### 3. **Lighting Techniques**
– **Natural Light**: Utilize natural light whenever possible. Position the model near a window or outdoors during the golden hour (early morning or late afternoon) for soft, flattering light.
– **Artificial Lighting**: If shooting indoors, use softbox lights or LED panels to create even lighting. Avoid harsh shadows by diffusing the light source.
– **Experiment with Angles**: Adjust the light source to create dramatic shadows or highlights that accentuate the car’s features.
### 4. **Camera Settings and Techniques**
– **Use a Tripod**: Stabilize your camera with a tripod to prevent blurriness, especially in low-light conditions.
– **Select the Right Lens**: A macro lens is ideal for close-up shots, while a standard lens can be used for wider compositions.
– **Adjust Aperture**: Use a lower f-stop (e.g., f/2.8 to f/4) for a shallow depth of field, which will blur the background and draw attention to the car.
– **Experiment with Angles**: Capture the model from various perspectives—low angles can create a sense of speed, while overhead shots can provide a comprehensive view of the details.
### 5. **Post-Processing**
– **Editing Software**: Utilize photo editing software (e.g., Adobe Lightroom, Photoshop) to enhance colors, adjust brightness and contrast, and crop the image for better composition.
– **Sharpening and Noise Reduction**: Apply sharpening to enhance details and reduce noise, especially if you shot at a high ISO.
### 6. **Final Review**
– **Evaluate Your Shots**: Review the images to determine which compositions and lighting worked best. Take notes for future shoots.
– **Seek Feedback**: Share your photos with peers or online communities for constructive criticism and suggestions.
By following these steps, you can effectively showcase your LEGO F1 car in a way that highlights its intricate design and captures the excitement of motorsport. Happy shooting!
### 1. **Choose the Right Background**
When selecting a background for a formal setting, consider the following elements to ensure it conveys professionalism and sophistication:
1. **Color Palette**: Opt for neutral or muted colors such as navy, gray, beige, or white. These colors exude professionalism and are less distracting.
2. **Texture and Material**: Choose backgrounds with subtle textures, such as linen or soft fabrics, which can add depth without being overwhelming. Avoid overly shiny or reflective surfaces.
3. **Simplicity**: A clean and uncluttered background is essential. Avoid busy patterns or images that can divert attention from the main subject.
4. **Lighting**: Ensure the background is well-lit but not harsh. Soft, diffused lighting can enhance the overall appearance and create a more inviting atmosphere.
5. **Contextual Relevance**: If the background is related to the subject matter (e.g., a library for an academic presentation), ensure it aligns with the theme while maintaining a formal tone.
6. **Professional Branding**: If applicable, incorporate subtle branding elements, such as a logo or company colors, to reinforce identity without overwhelming the formal aesthetic.
By carefully considering these factors, you can create a formal background that enhances the overall presentation and maintains a professional demeanor.
– **Neutral Backgrounds**: Use solid colors or simple textures to make your car stand out. A white, black, or gray backdrop can work well
When photographing cars, utilizing neutral backgrounds is essential for highlighting the vehicle’s features without distractions. Here are some tips for achieving a formal and polished look:
1. **Solid Colors**: Opt for backgrounds in white, black, or gray. These colors provide a clean and professional appearance, allowing the car to be the focal point of the image.
2. **Simple Textures**: If you prefer a bit of depth, consider using backgrounds with subtle textures, such as a soft gradient or a light fabric. Ensure that the texture does not overpower the car.
3. **Lighting**: Use soft, diffused lighting to minimize harsh shadows and reflections. Natural light during the golden hour can create a warm and inviting atmosphere, while studio lighting can provide a more controlled environment.
4. **Framing**: Position the car centrally within the frame to emphasize its design. Ensure that there is enough space around the vehicle to avoid a cramped appearance.
5. **Angles**: Experiment with different angles to showcase the car’s best features. Low angles can create a sense of power, while high angles can provide a comprehensive view of the vehicle.
6. **Post-Processing**: In post-editing, maintain a formal aesthetic by adjusting contrast and brightness to enhance the car’s details without altering the overall color balance.
By adhering to these guidelines, you can create striking images that present the car in a formal and sophisticated manner, ensuring it stands out against a neutral background.