Discover creative storage solutions for LEGO car collectors! Learn how to build a functional and stylish LEGO car garage to showcase your collection.
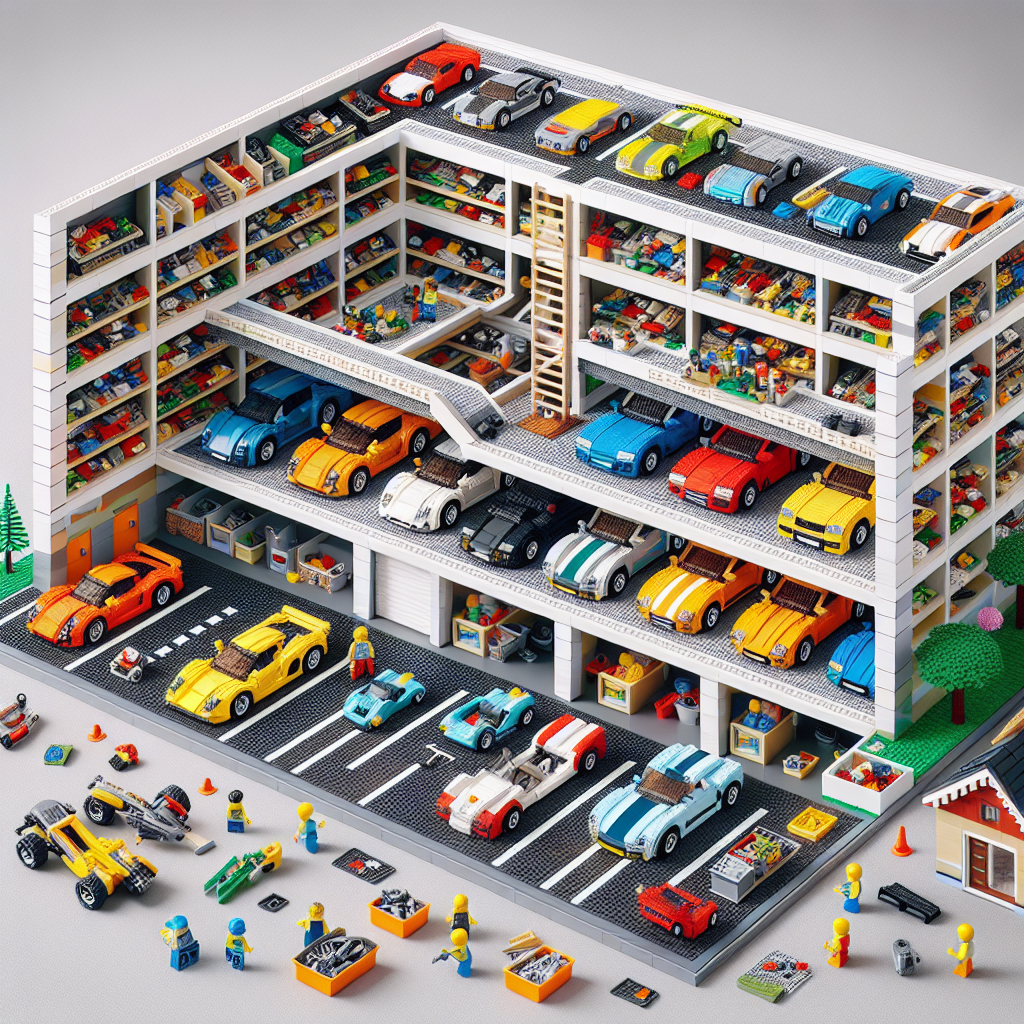
Building a LEGO car garage for your collection can be a fun and rewarding project. It not only provides a dedicated space for your LEGO cars but also helps keep them organized and protected. Here’s a step-by-step guide to creating a functional and aesthetically pleasing LEGO car garage:
### Step 1: Plan Your Garage
1. **Determine Size and Space**: Measure the area where you want to build the garage. Consider how many LEGO cars you have and how much space you need for future additions.
2. **Design Layout**: Sketch a layout that includes parking spaces, display areas, and storage solutions. Think about whether you want multiple levels or a single-story garage.
### Step 2: Gather Materials
1. **Baseplates**: Use LEGO baseplates as the foundation for your garage. Choose colors that match your theme.
2. **Bricks and Plates**: Gather various LEGO bricks and plates for walls, roofs, and other structural elements.
3. **Storage Containers**: Consider using clear bins or drawers for easy access and visibility of your cars.
4. **Display Stands**: Use acrylic stands or custom-built LEGO display stands to showcase your favorite models.
5. **Lighting**: LED strip lights or small lamps can enhance the display and make it visually appealing.
### Step 3: Build the Structure
1. **Create the Base**: Start with a large baseplate as the foundation. This will be the ground level of your garage.
2. **Construct Walls**: Build walls using bricks, leaving openings for doors and windows. You can create a modern look with large glass panels or a classic look with brick walls.
3. **Add a Roof**: Design a roof that complements the style of your garage. You can use sloped bricks for a pitched roof or flat plates for a modern look.
4. **Incorporate Parking Spaces**: Designate areas for parking your LEGO cars. You can use different colored plates to mark each space.
### Step 4: Organize Storage Solutions
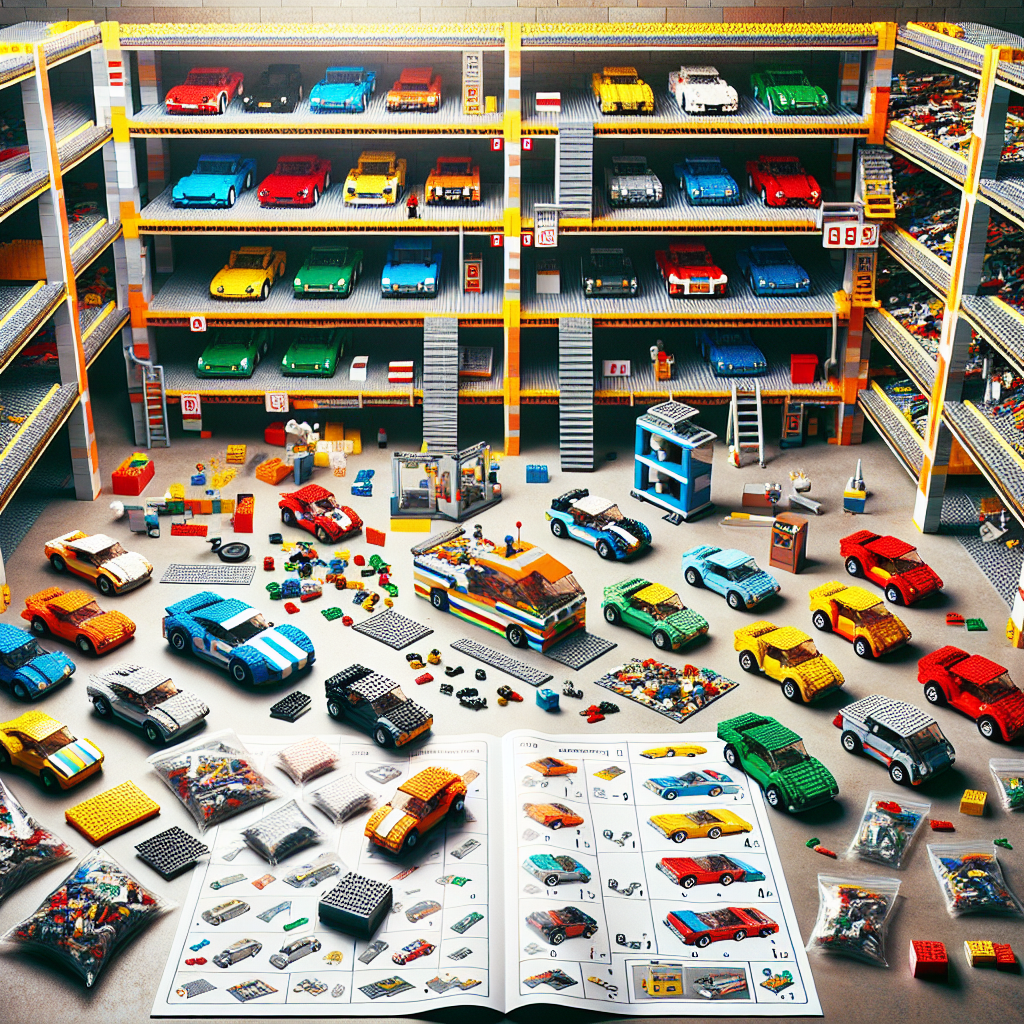
1. **Shelving Units**: Build or buy shelving units to store your LEGO cars. You can create multi-tiered shelves to maximize vertical space.
2. **Drawers and Bins**: Use clear bins or drawers to store smaller cars or accessories. Label each container for easy identification.
3. **Display Cases**: Consider using display cases for your most prized models. This keeps them dust-free and allows for easy viewing.
### Step 5: Add Details and Decor
1. **Signage**: Create a sign for your garage using LEGO bricks or printed labels. This adds a personal touch.
2. **Landscaping**: Add small plants, trees, or other landscaping elements around the garage to enhance the overall look.
3. **Accessories**: Include LEGO tools, gas pumps, or other garage-themed accessories to make the space feel more realistic.
### Step 6: Maintain and Update
1. **Regular Cleaning**: Keep your garage organized and dust-free. Regularly check for any loose pieces or damage.
2. **Update Your Collection**: As you acquire new LEGO cars, consider redesigning your garage layout to accommodate them.
3. **Showcase New Arrivals**: Rotate your display to highlight new additions or seasonal themes.
### Tips for Success
– **Involve Family or Friends**: Building a LEGO garage can be a fun group activity. Get others involved for ideas and assistance.
– **Be Creative**: Don’t be afraid to think outside the box. Use unconventional pieces or colors to make your garage unique.
– **Document Your Collection**: Keep a record of your collection, including photos and descriptions, to track your inventory and value.
By following these steps, you can create a functional and visually appealing LEGO car garage that showcases your collection while providing practical storage solutions. Enjoy the building process and let your creativity shine!
Building a LEGO car garage for your collection can be a fun and rewarding project. Here’s a step-by-step guide to help you create an organized and visually appealing storage solution for your LEGO cars
### Step-by-Step Guide to Building a LEGO Car Garage
Creating a LEGO car garage can be an enjoyable and fulfilling project that not only organizes your collection but also enhances its visual appeal. Follow this structured guide to design and construct your own LEGO car garage.
#### Materials Required
1. **LEGO Bricks**: A variety of bricks in different sizes and colors.
2. **Baseplates**: To serve as the foundation of your garage.
3. **Transparent Bricks or Panels**: For windows and display areas.
4. **Decorative Elements**: Such as plants, signage, and tools for added realism.
5. **Storage Containers**: Optional, for organizing smaller pieces.
#### Step 1: Planning Your Design
1. **Determine Size and Capacity**: Assess the number of LEGO cars you wish to store and the available space for the garage.
2. **Sketch a Layout**: Create a rough sketch of your garage, including the number of parking spaces, entrances, and any additional features such as a waiting area or repair station.
#### Step 2: Constructing the Base
1. **Select Baseplates**: Choose baseplates that will accommodate your design. A larger baseplate can provide more parking spaces.
2. **Build the Foundation**: Securely attach the baseplates together if using multiple pieces. Ensure the foundation is stable and level.
#### Step 3: Building the Structure
1. **Create Walls**: Use LEGO bricks to construct the walls of the garage. Consider leaving spaces for doors and windows.
2. **Add a Roof**: Design a roof that complements the overall aesthetic. You may opt for a flat roof or a sloped design, depending on your preference.
3. **Incorporate Windows**: Use transparent bricks or panels to create windows, allowing visibility into the garage.
#### Step 4: Designing the Interior
1. **Parking Spaces**: Allocate specific areas for each LEGO car. You can use different colored bricks or markings to designate individual parking spots.
2. **Additional Features**: Consider adding a service area with tools, a workbench, or a waiting area for visitors. Use smaller LEGO pieces to create these elements.
3. **Lighting**: If desired, incorporate LED lights to illuminate the garage, enhancing its visual appeal.
#### Step 5: Personalizing the Garage
1. **Decorative Elements**: Add plants, signage, and other decorative features to give your garage character. Consider using stickers or printed pieces for signage.
2. **Organizational Tools**: If you have smaller LEGO accessories, consider using storage containers or shelves within the garage to keep everything organized.
#### Step 6: Final Touches
1. **Review and Adjust**: Take a step back and assess your garage. Make any necessary adjustments to improve functionality or aesthetics.
2. **Display Your Collection**: Once satisfied with the design, place your LEGO cars in their designated spots and enjoy your newly organized garage.
#### Conclusion
Building a LEGO car garage is a creative endeavor that allows you to showcase and organize your collection effectively. By following this guide, you can create a functional and visually appealing storage solution that enhances your LEGO experience. Enjoy the process and let your creativity shine!
### Step 1: Plan Your Garage Design
### Step 1: Plan Your Garage Design
#### 1. Define the Purpose of the Garage
– **Storage**: Determine what items will be stored (e.g., vehicles, tools, seasonal items).
– **Workspace**: Consider if the garage will serve as a workshop or hobby area.
– **Multi-Use**: Evaluate the need for a combination of storage and workspace.
#### 2. Assess Available Space
– **Measurements**: Accurately measure the dimensions of the garage, including height, width, and depth.
– **Layout**: Analyze the current layout, including doors, windows, and any built-in features.
#### 3. Identify Key Features
– **Flooring**: Decide on flooring materials that are durable and easy to clean (e.g., epoxy, tiles).
– **Lighting**: Plan for adequate lighting, including overhead fixtures and task lighting.
– **Ventilation**: Ensure proper ventilation, especially if using the garage for work or storage of chemicals.
#### 4. Create a Design Layout
– **Zoning**: Designate areas for different functions (e.g., vehicle parking, tool storage, workbench).
– **Flow**: Ensure a logical flow of movement within the space, allowing easy access to frequently used items.
– **Accessibility**: Consider the placement of shelves, cabinets, and tools for ease of use.
#### 5. Select Storage Solutions
– **Shelving**: Choose adjustable shelving units to maximize vertical space.
– **Cabinets**: Incorporate cabinets for organized storage of tools and supplies.
– **Hooks and Racks**: Utilize wall-mounted hooks and racks for bicycles, ladders, and other equipment.
#### 6. Plan for Electrical and Plumbing Needs
– **Electrical Outlets**: Determine the number and placement of electrical outlets for tools and equipment.
– **Lighting Fixtures**: Plan for the installation of lighting fixtures that meet the needs of the space.
– **Plumbing**: If necessary, consider the installation of a sink or water source for cleaning purposes.
#### 7. Budget Considerations
– **Cost Estimation**: Create a budget that includes materials, labor, and any additional features.
– **Prioritization**: Identify essential features versus optional upgrades to manage costs effectively.
#### 8. Review and Revise
– **Feedback**: Seek input from family members or professionals to refine the design.
– **Adjustments**: Be open to making adjustments based on practical considerations or new ideas.
#### 9. Finalize the Design
– **Blueprints**: Create detailed blueprints or sketches of the final design.
– **Materials List**: Compile a comprehensive list of materials and tools needed for implementation.
#### 10. Prepare for Implementation
– **Timeline**: Establish a timeline for the project, including phases of construction or organization.
– **Permits**: Check local regulations to determine if any permits are required for renovations.
By following these steps, you can create a well-organized and functional garage that meets your specific needs and enhances the overall utility of your home.
**Determine Size and Space**: Measure the area where you want to place the garage. Consider how many LEGO cars you have and how much space you need
**Determining Size and Space for a LEGO Garage**
1. **Measure the Area**: Begin by accurately measuring the dimensions of the designated area where the garage will be placed. Use a tape measure to obtain the length and width in either inches or centimeters, ensuring to record these measurements for reference.
2. **Assess LEGO Car Inventory**: Compile a comprehensive inventory of your LEGO cars. Count the total number of vehicles you possess and categorize them by size if applicable. This will provide insight into the spatial requirements for storage and display.
3. **Calculate Required Space**: Based on the dimensions of your LEGO cars, estimate the total area needed for the garage. Consider the following factors:
– **Individual Car Dimensions**: Measure the length and width of the largest LEGO car to determine the minimum space required for each vehicle.
– **Arrangement**: Decide on the arrangement of the cars within the garage (e.g., side-by-side, stacked, or in rows) to optimize space utilization.
– **Additional Features**: Account for any additional features you may want to include in the garage, such as ramps, parking spaces, or display areas.
4. **Create a Layout Plan**: Draft a layout plan that incorporates the measurements of the area and the required space for the LEGO cars. This plan should include:
– The overall dimensions of the garage.
– Designated parking spaces for each vehicle.
– Any additional elements such as storage for accessories or tools.
5. **Final Considerations**: Ensure that the garage design allows for easy access to the vehicles and does not impede movement within the surrounding area. Additionally, consider the aesthetic aspects of the garage to complement your existing LEGO collection.
By following these steps, you will be able to effectively determine the size and space requirements for your LEGO garage, ensuring it meets your needs and enhances your collection.