Discover tips for transitioning your LEGO car collection from tabletop setups to stunning wall-mounted displays for a stylish and space-saving showcase!
Transitioning from tabletop to wall-mounted LEGO car displays can be a rewarding way to showcase your collection while saving space and adding a unique aesthetic to your room. Here’s a step-by-step guide to help you make the transition smoothly:
### 1. **Assess Your Collection**
– **Inventory**: Take stock of the LEGO cars you want to display. Consider their size, shape, and how many you have.
– **Theme**: Decide if you want to display them by theme (e.g., classic cars, race cars, etc.) or by color.
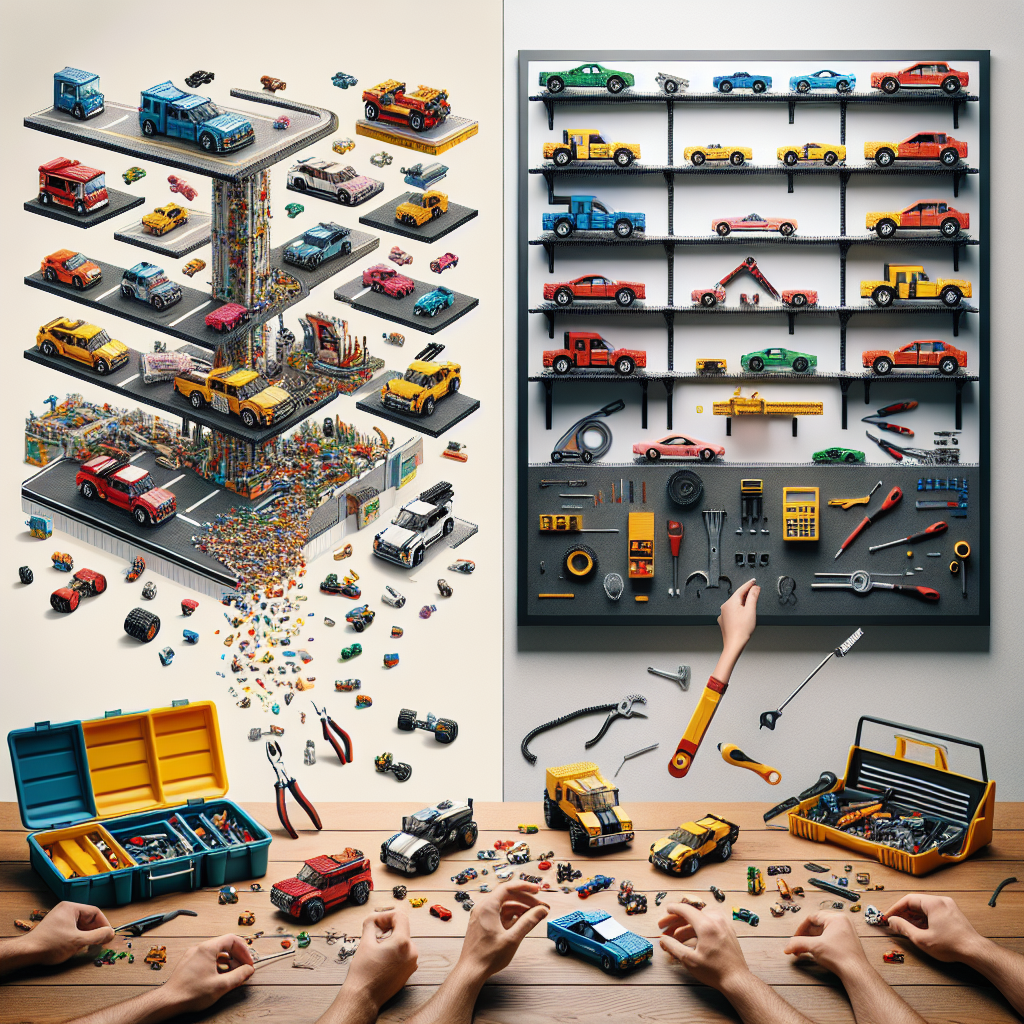
### 2. **Choose the Right Location**
– **Wall Space**: Identify a suitable wall that has enough space for your display. Consider visibility and accessibility.
– **Lighting**: Ensure the area is well-lit or can be enhanced with additional lighting to highlight your display.
### 3. **Select Display Method**
– **Shelves**: Floating shelves are a popular choice for displaying LEGO cars. They provide a clean look and can be arranged at various heights.
– **Shadow Boxes**: These can protect your models from dust while allowing for a 3D display.
– **Display Cases**: Wall-mounted display cases can provide a more enclosed option, protecting your models while showcasing them.
– **Custom Mounts**: Consider creating or purchasing custom mounts that can hold the cars securely.
### 4. **Plan the Layout**
– **Mock-Up**: Use painter’s tape to outline where the shelves or display cases will go on the wall. This helps visualize the layout.
– **Arrangement**: Experiment with different arrangements before finalizing. Consider varying heights and spacing for visual interest.
### 5. **Gather Materials**
– **Shelves/Display Cases**: Purchase or build the shelves or cases you’ve chosen.
– **Mounting Hardware**: Ensure you have the right hardware for mounting, such as brackets, screws, and anchors suitable for your wall type.
– **Tools**: Gather tools like a level, drill, screwdriver, and measuring tape.
### 6. **Install the Display**
– **Mark the Wall**: Use a level to mark where the shelves or cases will be mounted.
– **Drill Holes**: Follow the manufacturer’s instructions for mounting, ensuring you drill into studs or use appropriate anchors for drywall.
– **Secure Shelves/Cases**: Install the shelves or cases securely, double-checking that they are level.
### 7. **Arrange Your LEGO Cars**
– **Placement**: Carefully place your LEGO cars on the shelves or in the display cases. Consider using small stands or bases if needed to elevate certain models.
– **Spacing**: Leave enough space between models to avoid crowding and to allow for easy viewing.
### 8. **Add Finishing Touches**
– **Lighting**: Consider adding LED strip lights or spotlights to enhance the display.
– **Background**: If using shadow boxes or cases, consider a background that complements your cars (e.g., a cityscape or racing track).
– **Labels**: If desired, label each car with its name, model, or any interesting facts.
### 9. **Maintain Your Display**
– **Dusting**: Regularly dust your display to keep it looking fresh.
– **Rearranging**: Don’t hesitate to rearrange your display as you acquire new models or want to refresh the look.
### 10. **Showcase Your Work**
– **Photography**: Take photos of your new display to share with friends or on social media.
– **Invite Feedback**: Share your display with fellow LEGO enthusiasts for tips and suggestions.
By following these steps, you can create an impressive wall-mounted display that not only showcases your LEGO car collection but also enhances your living space. Enjoy the process and have fun with your display!
Transitioning from tabletop to wall-mounted LEGO car displays can be a rewarding way to showcase your collection while saving space and adding a unique aesthetic to your room. Here’s a step-by-step guide to help you make the transition smoothly:
**Transitioning from Tabletop to Wall-Mounted LEGO Car Displays: A Step-by-Step Guide**
Transitioning your LEGO car collection from a tabletop display to a wall-mounted arrangement can enhance your space while providing a visually appealing showcase for your models. This guide outlines a systematic approach to facilitate this transition effectively.
### Step 1: Assess Your Collection
Begin by evaluating your current LEGO car collection. Consider the following:
– **Quantity and Size**: Take note of the number of models and their dimensions to determine the appropriate wall space required.
– **Display Preferences**: Identify which models you wish to display prominently and any that may be better suited for storage.
### Step 2: Choose the Right Location
Select a suitable wall space that complements your room’s aesthetic. Consider the following factors:
– **Visibility**: Choose a location that is easily visible and accessible.
– **Lighting**: Ensure the area is well-lit to highlight your collection.
– **Height**: Consider the height at which the display will be mounted, ensuring it is at eye level for optimal viewing.
### Step 3: Select Display Method
There are various methods for wall-mounting LEGO displays. Consider the following options:
– **Shelving Units**: Floating shelves or dedicated display shelves can provide a clean and organized look.
– **Shadow Boxes**: These can protect your models while allowing for a three-dimensional display.
– **Custom Frames**: Create or purchase frames designed specifically for LEGO displays, allowing for a more artistic presentation.
### Step 4: Gather Materials
Once you have chosen your display method, gather the necessary materials:
– **Mounting Hardware**: Ensure you have the appropriate brackets, screws, and anchors for secure installation.
– **Display Accessories**: Consider using display stands or risers to enhance visibility and organization.
– **Cleaning Supplies**: Have microfiber cloths and cleaning solutions on hand to maintain the cleanliness of your models.
### Step 5: Prepare the Wall
Before installation, prepare the wall surface:
– **Clean the Area**: Remove any dust or debris from the wall.
– **Mark the Layout**: Use a pencil to lightly mark where each shelf or display unit will be mounted, ensuring even spacing and alignment.
### Step 6: Install the Display
Follow these steps to install your chosen display method:
1. **Drill Holes**: Based on your markings, drill holes for the mounting hardware.
2. **Secure Brackets**: Attach the brackets or mounting hardware securely to the wall.
3. **Install Shelves or Displays**: Place your shelves or display units onto the mounted brackets, ensuring they are level and stable.
### Step 7: Arrange Your Collection
Carefully arrange your LEGO cars on the newly mounted display:
– **Organize by Theme or Size**: Consider grouping models by theme, color, or size for a cohesive look.
– **Utilize Vertical Space**: Take advantage of the height of your display to create visual interest.
– **Adjust as Needed**: Step back and assess the arrangement, making adjustments to achieve the desired aesthetic.
### Step 8: Maintain Your Display
To keep your wall-mounted LEGO car display looking its best:
– **Regular Cleaning**: Dust your models and display units regularly to prevent buildup.
– **Rearrangement**: Periodically change the arrangement to refresh the display and keep it engaging.
### Conclusion
Transitioning from a tabletop to a wall-mounted LEGO car display can significantly enhance your collection’s visibility and aesthetic appeal. By following this step-by-step guide, you can create a stunning showcase that not only saves space but also adds a unique touch to your room. Enjoy the process of displaying your passion for LEGO in a new and exciting way!
### 1. **Assess Your Collection**
**1. Assess Your Collection**
To effectively evaluate your collection, it is essential to undertake a systematic and comprehensive assessment. This process involves several key steps:
1. **Inventory Documentation**: Begin by creating a detailed inventory of all items in your collection. This should include descriptions, quantities, conditions, and any relevant provenance information. Utilize a standardized format to ensure consistency and ease of reference.
2. **Condition Evaluation**: Examine each item for its physical condition. Note any signs of wear, damage, or deterioration. This assessment will help determine the need for conservation efforts and inform future care strategies.
3. **Categorization**: Organize your collection into categories based on relevant criteria such as type, period, origin, or thematic relevance. This will facilitate a clearer understanding of the collection’s scope and strengths.
4. **Value Assessment**: Consider the monetary and intrinsic value of each item. This may involve consulting with experts or appraisers to establish current market values, which can be crucial for insurance purposes and potential future sales.
5. **Relevance and Significance**: Reflect on the relevance of each item within the context of your overall collection goals. Assess whether each piece contributes to the narrative or theme you wish to convey and consider the significance of items in relation to historical, cultural, or artistic contexts.
6. **Future Planning**: Based on your assessment, develop a strategic plan for the future of your collection. This may include conservation efforts, potential acquisitions, or deaccessioning items that no longer align with your objectives.
7. **Documentation and Reporting**: Compile your findings into a formal report that outlines the assessment process, findings, and recommendations. This document will serve as a valuable resource for future reference and decision-making.
By conducting a thorough assessment of your collection, you will gain valuable insights that will inform its management, preservation, and potential growth, ensuring that it remains a meaningful and valuable resource.
– **Inventory**: Take stock of the LEGO cars you want to display. Consider their sizes, shapes, and any special features
**Inventory Assessment of LEGO Cars for Display**
1. **Objective**: To conduct a comprehensive inventory of the LEGO cars intended for display, ensuring a systematic evaluation of their sizes, shapes, and special features.
2. **Procedure**:
– **Cataloging**: Create a detailed list of all LEGO cars available for display. This list should include the following information for each item:
– Model name or number
– Dimensions (length, width, height)
– Color scheme
– Special features (e.g., movable parts, unique designs, limited editions)
3. **Classification**:
– **Size Categories**: Organize the cars into size categories (e.g., small, medium, large) to facilitate optimal display arrangements.
– **Shape Analysis**: Note the various shapes (e.g., sports cars, trucks, vintage models) to ensure a diverse representation in the display.
– **Feature Highlighting**: Identify any special features that may enhance the visual appeal or thematic coherence of the display.
4. **Documentation**: Maintain a digital or physical record of the inventory, including photographs of each car, to assist in future reference and display planning.
5. **Review and Finalization**: Once the inventory is complete, review the list for accuracy and completeness. Make any necessary adjustments before proceeding to the display arrangement phase.
By following this structured approach, we can ensure a well-organized and visually appealing display of LEGO cars that highlights their unique characteristics and craftsmanship.