Discover step-by-step tips to build and beautifully display the stunning LEGO 10280 Flower Bouquet, perfect for any home decor!
Building and displaying the LEGO 10280 Flower Bouquet can be a fun and rewarding experience. Here’s a step-by-step guide to help you through the process:
### Step 1: Gather Your Materials
– **LEGO Set 10280**: Ensure you have the complete set, which includes all the pieces and the instruction manual.
– **Workspace**: Find a clean, flat surface to build on. A table or desk works well.
– **Lighting**: Good lighting will help you see the pieces clearly.
### Step 2: Organize Your Pieces
– **Sort the Pieces**: Before you start building, it can be helpful to sort the pieces by color or type. This will make it easier to find what you need as you follow the instructions.
### Step 3: Follow the Instructions
– **Open the Instruction Manual**: The manual will guide you through the building process step by step.
– **Build the Stems**: Start by constructing the stems of the flowers. The set includes various types of flowers, so pay attention to the specific instructions for each one.
– **Assemble the Flowers**: Follow the instructions to build each flower. The set includes a variety of flower types, such as roses, daisies, and more. Each flower has its unique assembly process.
– **Combine the Stems and Flowers**: Once you have built the flowers, attach them to the stems. Make sure they are securely connected.
### Step 4: Create the Arrangement
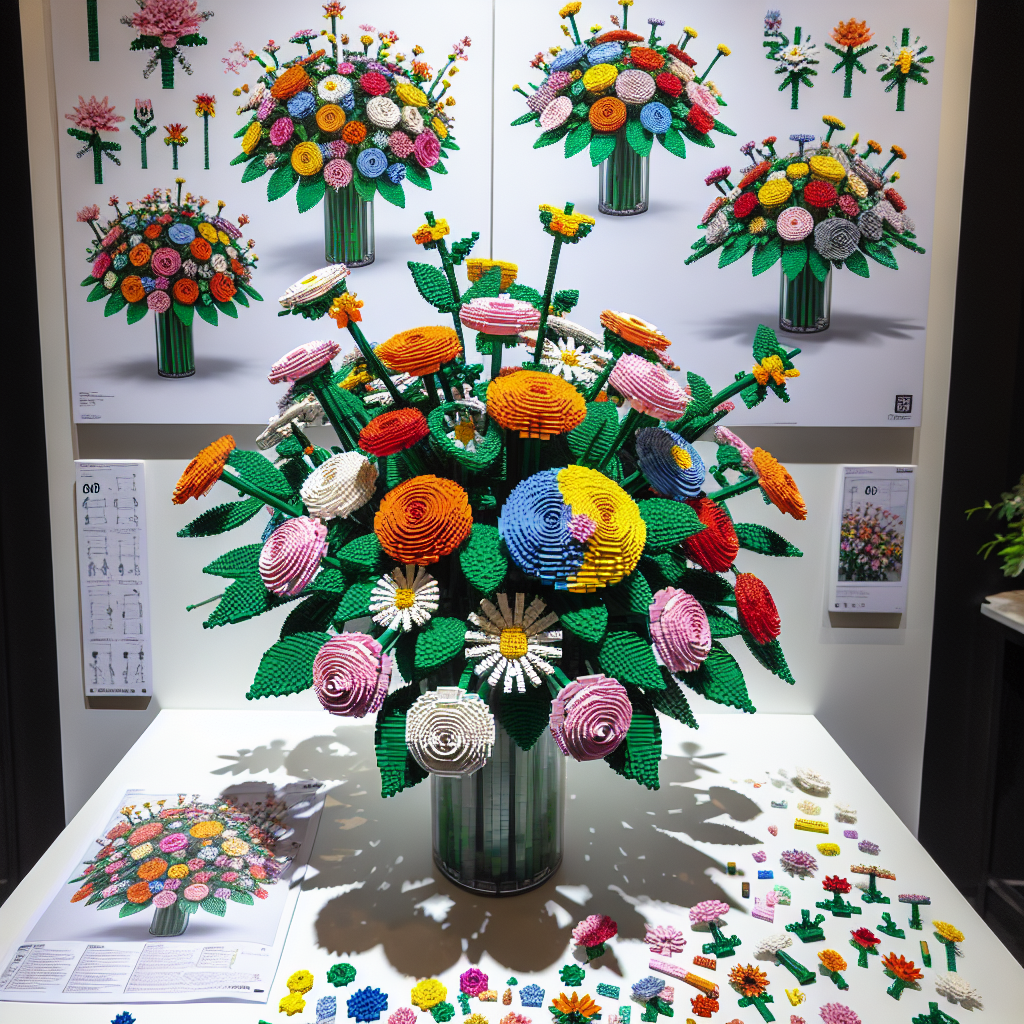
– **Arrange the Flowers**: Once all the flowers are attached to their stems, arrange them in a way that looks visually appealing. You can adjust the height and angle of the flowers to create a natural look.
– **Add the Vase**: The set includes a vase. Place the assembled flowers into the vase. You can also customize the vase with additional pieces if you like.
### Step 5: Display Your Creation
– **Choose a Display Location**: Find a prominent place in your home to display your LEGO Flower Bouquet. A shelf, table, or windowsill can be great options.
– **Consider Lighting**: If possible, place your bouquet in a well-lit area to highlight its colors and details.
– **Protect from Dust**: To keep your bouquet looking fresh, consider placing it in a display case or covering it with a glass dome to protect it from dust.
### Step 6: Enjoy and Share
– **Admire Your Work**: Take a moment to appreciate your creation. The LEGO Flower Bouquet is a beautiful piece that can brighten up any space.
– **Share with Others**: If you’re proud of your work, consider sharing photos on social media or with friends and family. You can also join LEGO fan communities to showcase your build.
### Tips for Building
– **Take Your Time**: Enjoy the building process and don’t rush. It’s about the experience as much as the final product.
– **Be Creative**: Feel free to mix and match pieces or create your own flower designs if you want to personalize your bouquet further.
By following these steps, you’ll be able to build and display a stunning LEGO 10280 Flower Bouquet that you can enjoy for years to come!
Building and displaying the LEGO 10280 Flower Bouquet can be a fun and rewarding experience. Here’s a step-by-step guide to help you through the process:
Certainly! Below is a formal step-by-step guide for building and displaying the LEGO 10280 Flower Bouquet set.
—
### Step-by-Step Guide to Building and Displaying the LEGO 10280 Flower Bouquet
#### Introduction
The LEGO 10280 Flower Bouquet set offers a creative and enjoyable building experience, allowing you to construct a beautiful arrangement of flowers that can be displayed in your home or office. This guide will provide you with clear instructions to ensure a successful assembly.
#### Materials Required
– LEGO 10280 Flower Bouquet set
– A clean, flat workspace
– Optional: A small container or vase for display
#### Step 1: Unbox the Set
1. Carefully open the box and remove all components.
2. Ensure that you have all the pieces by checking the inventory list included in the instruction manual.
#### Step 2: Organize the Pieces
1. Sort the LEGO pieces by color and type to facilitate easier assembly.
2. Keep the instruction manual nearby for reference.
#### Step 3: Begin Assembly
1. **Follow the Instruction Manual**: Start with the first step in the instruction manual. Each step will guide you through the assembly process.
2. **Assemble the Stems**: Begin by constructing the stems of the flowers. Use the green pieces to create a sturdy base for each flower.
3. **Build the Flowers**: Follow the instructions to build each flower. The set includes various types of flowers, such as tulips and daisies. Pay attention to the unique assembly techniques for each flower type.
#### Step 4: Combine the Flowers and Stems
1. Once all flowers are assembled, attach them to their respective stems.
2. Ensure that each flower is securely connected to its stem for stability.
#### Step 5: Arrange the Bouquet
1. Carefully arrange the flowers in a visually appealing manner.
2. Adjust the height and angle of each flower to create a natural look.
#### Step 6: Prepare for Display
1. Select a suitable container or vase for your bouquet. A clear glass vase or a decorative pot can enhance the display.
2. Place the assembled bouquet into the container, ensuring that it stands upright and stable.
#### Step 7: Final Touches
1. Consider adding decorative elements, such as pebbles or faux water, to the base of the bouquet for added aesthetic appeal.
2. Position the bouquet in a well-lit area to showcase its vibrant colors.
#### Conclusion
Building the LEGO 10280 Flower Bouquet is a delightful activity that results in a stunning display piece. By following this guide, you can enjoy the process of creation and take pride in your finished arrangement. Display your bouquet prominently to brighten up your space and share your accomplishment with others.
—
Feel free to refer back to this guide as needed during your building process. Enjoy your LEGO experience!
### Step 1: Gather Your Materials
### Step 1: Gather Your Materials
To ensure a successful and efficient process, it is essential to collect all necessary materials prior to commencing your task. This preparation will facilitate a smoother workflow and minimize interruptions. Below is a comprehensive list of items you may need, depending on the nature of your project:
1. **Documentation**:
– Relevant manuals, guidelines, or reference materials.
– Any necessary forms or templates.
2. **Tools and Equipment**:
– Specific tools required for the task (e.g., writing instruments, measuring devices, or technical equipment).
– Safety gear, if applicable (e.g., gloves, goggles, or masks).
3. **Supplies**:
– Materials such as paper, ink, or other consumables.
– Organizational items like folders, binders, or storage containers.
4. **Technology**:
– Computers, tablets, or other electronic devices.
– Software applications or programs relevant to your project.
5. **Workspace**:
– A clean and organized area conducive to your work.
– Adequate lighting and seating arrangements.
6. **Support Resources**:
– Contact information for colleagues or experts who can provide assistance.
– Access to online resources or databases.
By systematically gathering these materials, you will be well-prepared to proceed with your project efficiently and effectively.
– **LEGO Set 10280**: Ensure you have the complete set, which includes all the pieces and the instruction manual
To ensure the completeness of LEGO Set 10280, please verify that you possess all components of the set, including every individual piece and the accompanying instruction manual. It is advisable to cross-reference the contents with the official inventory list provided by LEGO to confirm that nothing is missing. Should you find any discrepancies, please consider reaching out to LEGO customer service for assistance.